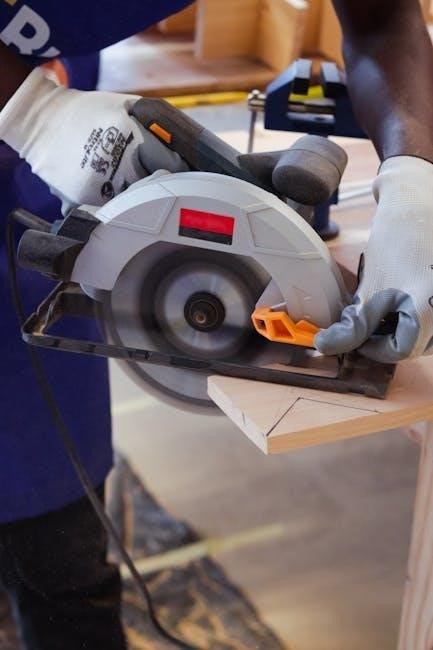
Hand saws with guides elevate woodworking precision, offering controlled cuts, especially for straight lines – a challenge even with circular saws.
These tools combine traditional sawing with modern stability, making projects easier and more accurate for both beginners and experienced craftspeople.
What is a Hand Saw with Guide?
A hand saw with guide isn’t a fundamentally different saw; it’s a standard hand saw utilized with an accompanying guide. This guide, typically metal, wood, or a self-adhesive strip, provides a physical reference for the saw blade, ensuring straight and accurate cuts.
Essentially, the guide acts as a channel, restricting the saw’s movement to a predetermined path. This is particularly useful when cutting across wood grain (crosscut) or along it (rip cut), where maintaining a consistent angle is crucial. The guide mitigates wandering, resulting in cleaner, more professional-looking results, even for those less experienced with freehand sawing.
Benefits of Using a Hand Saw with Guide
Employing a hand saw with guide delivers numerous advantages. Primarily, it drastically improves cut accuracy, minimizing errors and wasted material – vital for precise joinery. It’s exceptionally helpful for those new to woodworking, building confidence and skill. Guides reduce physical strain, as less effort is needed to maintain a straight line.
Furthermore, they enhance safety by controlling the saw’s path, lessening the risk of slipping. The resulting cuts are cleaner and require less sanding or finishing. Ultimately, a guided hand saw bridges the gap between manual skill and machine-like precision.
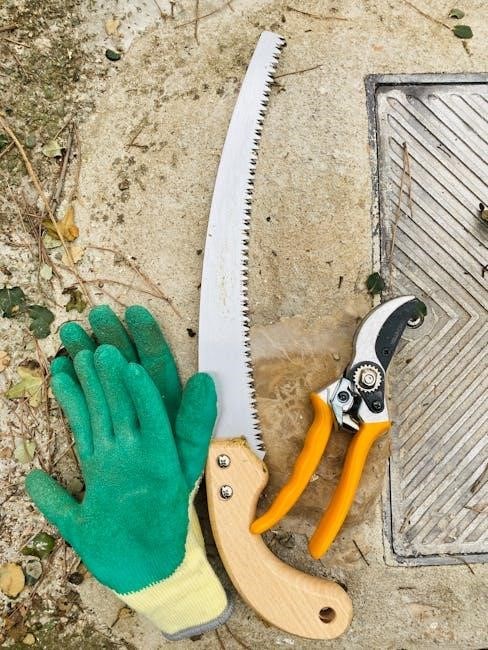
Types of Hand Saws for Use with Guides
Various hand saws work effectively with guides, including rip saws for cutting with the grain, crosscut saws for across it, and specialized back saws.
Rip Saws and Their Application
Rip saws are specifically designed for cutting with the wood grain, efficiently separating long boards into narrower pieces. Their teeth are shaped like chisels, optimized for removing material along the wood fibers;
When used with a guide, rip saws deliver remarkably straight and consistent cuts, minimizing tear-out and ensuring clean edges. A guide is particularly beneficial for longer rip cuts, preventing the saw from drifting off course;
Employing a guide enhances control, especially for those less experienced with freehand ripping. The combination yields professional-quality results, crucial for projects demanding precision and structural integrity.
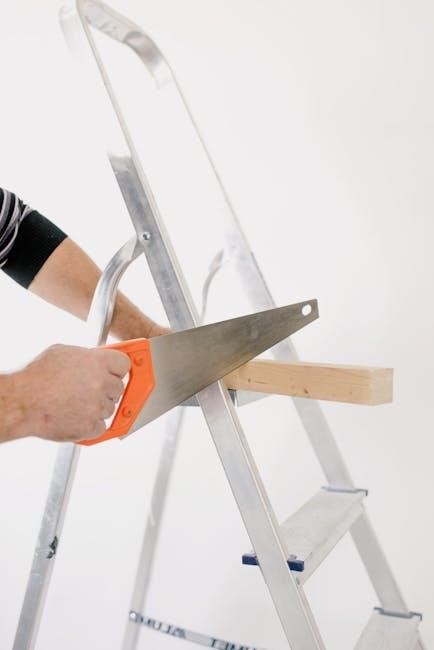
Crosscut Saws and Their Application
Crosscut saws excel at cutting across the wood grain, ideal for shortening boards or creating precise angles. Their teeth are filed to act like tiny knives, severing wood fibers perpendicularly. Utilizing a guide with a crosscut saw dramatically improves accuracy.
Achieving perfectly straight crosscuts freehand can be difficult; a guide eliminates wobble and ensures a clean, square cut every time. This is especially valuable for joinery where precise angles are paramount.
The guide’s stability minimizes the risk of splintering and provides consistent results, enhancing the overall quality of your woodworking projects.
Back Saws (Dovetail, Tenon, Carcass)
Back saws, characterized by a stiffening rib along the blade’s spine, are designed for precision work. Dovetail, tenon, and carcass saws fall into this category, each suited for specific joinery tasks. A guide significantly enhances their already inherent accuracy.
The reinforced blade minimizes flexing, crucial for delicate cuts. When paired with a guide, these saws deliver exceptionally clean and square lines, vital for tight-fitting joints.
Using a guide with back saws ensures consistent depth and angle, simplifying complex cuts and improving overall project quality.

Guide Types and Materials
Cutting guides come in metal, wood, and self-adhesive forms, each offering unique benefits. Material choice impacts stability, durability, and ease of use during sawing.
Metal Cutting Guides
Metal cutting guides, often constructed from aluminum or steel, represent a robust and highly accurate option for hand sawing. Their rigidity minimizes flex, ensuring consistently straight cuts, even when working with harder wood species or thicker materials.
These guides frequently feature a clamped design, securely attaching to the workpiece and providing a stable channel for the saw blade. Many incorporate adjustable angles, allowing for bevel cuts. The precision offered by metal guides makes them ideal for tasks demanding tight tolerances, such as dovetail joints or precise trim work. They are a worthwhile investment for serious woodworkers.
Wooden Cutting Guides
Wooden cutting guides offer a more affordable and readily customizable alternative to metal guides. Typically crafted from hardwood like maple or oak, these guides provide a stable platform for hand sawing, though generally with slightly less rigidity than their metal counterparts.
Wood allows for easy modification; angles can be adjusted and the guide itself can be shaped to suit specific project needs. They are often constructed with a groove to accommodate the saw blade, ensuring a straight cutting path. While requiring more careful clamping to prevent movement, wooden guides are excellent for general woodworking tasks.
Self-Adhesive Guides
Self-adhesive guides represent a convenient and portable solution for achieving straight cuts with a hand saw. These guides typically consist of a durable plastic strip with a pre-applied adhesive backing, allowing for quick and easy application directly onto the workpiece.
They are particularly useful for smaller projects or situations where a more permanent guide isn’t practical. While offering less rigidity than metal or wooden options, they are ideal for quick, accurate cuts and are easily replaceable when the adhesive loses its grip or the guide becomes worn.

Setting Up Your Hand Saw and Guide
Proper setup is crucial for accurate cuts; securely attach the saw to the guide, ensuring perfect alignment with your marked line on the workpiece.
Attaching the Saw to the Guide
Securing the saw within the guide is paramount for stability and precision. Most guides feature adjustable clamps or slots designed to accommodate various saw blade widths.
Ensure the saw blade sits flush against the guide’s cutting edge, eliminating any wobble or play. Tighten the clamps firmly, but avoid over-tightening, which could damage the saw or guide.
Double-check that the saw teeth are correctly oriented for the desired cut – rip or crosscut – before proceeding. A properly attached saw will move smoothly within the guide, facilitating accurate and controlled cuts.
Ensuring Proper Alignment
Precise alignment between the saw, guide, and marked cutting line is crucial for accurate results. Visually inspect the setup, confirming the saw blade follows the intended path without deviation.
Many guides incorporate a notch or indicator to align with the marked line. Utilize this feature diligently, making minor adjustments as needed. A slight misalignment can lead to significant errors over the length of the cut.
Regularly check alignment during the initial strokes, ensuring the saw remains on course. Consistent monitoring guarantees a clean, straight cut.
Securing the Guide to the Workpiece
Firmly attaching the guide to the workpiece prevents movement during sawing, which is paramount for accuracy. Clamps are the most common method, ensuring a secure hold without damaging the wood.
Position clamps strategically, avoiding interference with the saw’s path. Consider using padded clamps to protect the workpiece surface. For irregular shapes, specialized clamps or temporary adhesive may be necessary.
Before cutting, test the guide’s stability by applying gentle pressure. Any wobble indicates insufficient clamping and requires readjustment for a clean, precise cut.

Techniques for Accurate Cutting
Mastering hand sawing with a guide involves a deliberate start, consistent angle maintenance, and controlled completion for clean, accurate results every time.
Starting the Cut
Initiating the cut with a hand saw and guide requires a gentle approach. Begin with a few light, guiding strokes, establishing a shallow kerf along the marked line.
Avoid applying full pressure immediately; instead, focus on creating a consistent groove within the guide’s channel.
This initial phase is crucial for preventing the saw from wandering off course.
Use your non-dominant hand to lightly stabilize the saw blade, ensuring it remains seated within the guide.
Gradually increase pressure with each subsequent stroke, deepening the cut while maintaining alignment until a noticeable groove is formed.
Maintaining a Consistent Angle
Consistent angle maintenance is paramount for accurate cuts using a hand saw and guide. Throughout the sawing motion, focus on keeping the saw blade perpendicular to the workpiece, relying on the guide for support.
Avoid tilting or twisting the saw, as this will result in a bevelled or uneven cut.
Maintain a steady, even pressure on both the push and pull strokes.
Regularly check the blade’s alignment against the guide to ensure it hasn’t drifted.
A smooth, controlled rhythm will contribute to a cleaner, more precise result.
Completing the Cut
Finishing the cut requires a gradual reduction in pressure as the blade nears the end of the stroke. Avoid forcing the saw through the last bit of material, which can cause splintering or damage to the guide.
Slow down your sawing speed and maintain a consistent angle until the cut is fully completed.
Support the offcut piece to prevent it from breaking or tearing as it separates from the workpiece.
Once finished, carefully remove the saw and guide, inspecting the cut for any imperfections.

Choosing the Right Saw and Guide Combination
Selecting the ideal pairing depends on material thickness and the cut type – rip or crosscut – ensuring optimal performance and accuracy for your project.
Material Thickness Considerations
When selecting a hand saw and guide, the workpiece’s thickness is paramount. Thicker materials generally require saws with more aggressive tooth patterns and robust guides to prevent binding.
For thinner stock, a finer-toothed saw paired with a precise guide will minimize tear-out and deliver cleaner cuts. Consider the saw’s kerf (width of the cut) as well; a wider kerf removes more material.
Guides themselves should be sturdy enough to support the material without flexing, especially during longer cuts. A flexible guide can lead to inaccuracies and a compromised finish, so choose wisely!
Cut Type Considerations (Rip vs. Crosscut)
Understanding rip versus crosscut cuts is crucial when pairing a hand saw with a guide. Rip cuts, following the wood grain, demand saws with teeth designed to efficiently shear wood fibers – typically larger, more aggressive teeth.
Crosscuts, severing across the grain, require saws with teeth angled to cleanly slice fibers, preventing splintering. A guide enhances both, but the saw’s geometry remains key.
Using the wrong saw type, even with a guide, will result in a rough, inefficient cut. Select a saw specifically designed for the intended cut direction for optimal results.
Maintenance and Care
Regular maintenance ensures optimal performance. Sharpening your hand saw and cleaning the guide are essential for accurate, effortless cuts and prolonged tool life.
Sharpening Your Hand Saw
Maintaining a sharp blade is paramount for efficient and clean cuts when using a hand saw with a guide. Dull blades require excessive force, leading to inaccurate results and increased user fatigue. Sharpening involves removing small amounts of metal to restore the original tooth geometry.
A saw vise securely holds the saw during the process. Utilize a triangular file, following the existing tooth angle, and consistently file each tooth. Regular sharpening, even a light touch-up, will dramatically improve your sawing experience and the quality of your woodworking projects. Consider professional sharpening if you’re unsure of the technique.
Cleaning and Storing the Guide
Proper care extends the lifespan of your hand saw guide, ensuring continued accuracy. After each use, remove sawdust and debris with a brush or compressed air. Avoid using solvents that could damage the guide’s material, especially plastic components.
For metal guides, a light coat of oil can prevent rust. Store the guide in a dry environment, away from extreme temperatures and humidity. Protecting it from physical impacts will prevent warping or cracking. Careful storage guarantees it’s ready for precise cuts every time you need it.

Safety Precautions
Always prioritize safety when using a hand saw and guide; wear safety glasses to protect your eyes from flying debris and maintain firm hand positioning.
Using Safety Glasses
Protecting your eyes is paramount when operating a hand saw, even with a guide. Sawing generates small particles of wood, metal, or plastic that can easily become projectiles. These fragments, though often tiny, pose a significant risk of causing irritation, scratches, or even more serious eye injuries.
Always wear ANSI-approved safety glasses that provide comprehensive coverage, shielding your eyes from both the sides and above. Regular eyeglasses or sunglasses do not offer sufficient protection. Ensure the glasses fit snugly and comfortably for extended use. Prioritize eye safety – it’s a simple step with a huge impact!
Proper Hand Positioning
Maintaining correct hand positioning is crucial for control and safety when using a hand saw with a guide. Your non-dominant hand should gently guide the saw, applying even pressure along the guide’s edge, never directly in the path of the blade.
The dominant hand provides the power for the stroke, keeping fingers clear of the blade’s path. A firm, but relaxed grip is essential; avoid over-tightening, which can lead to fatigue and reduced control. Focus on smooth, controlled movements, letting the saw do the work, not forcing it.
Avoiding Kickback
Kickback, though less common with hand saws and guides than power tools, can still occur. It’s typically caused by the saw binding within the cut or applying uneven pressure. To prevent this, ensure the guide is securely fastened and the saw blade remains aligned throughout the stroke.
Maintain a steady rhythm and avoid forcing the saw. If resistance increases, stop, reassess the cut, and adjust your technique. Never reach across the blade’s path, and always keep your body positioned safely to the side, minimizing potential injury.
Advanced Techniques
Mastering curves and complex cuts requires utilizing multiple guides or specialized flexible guides, demanding precision and careful planning for optimal results.
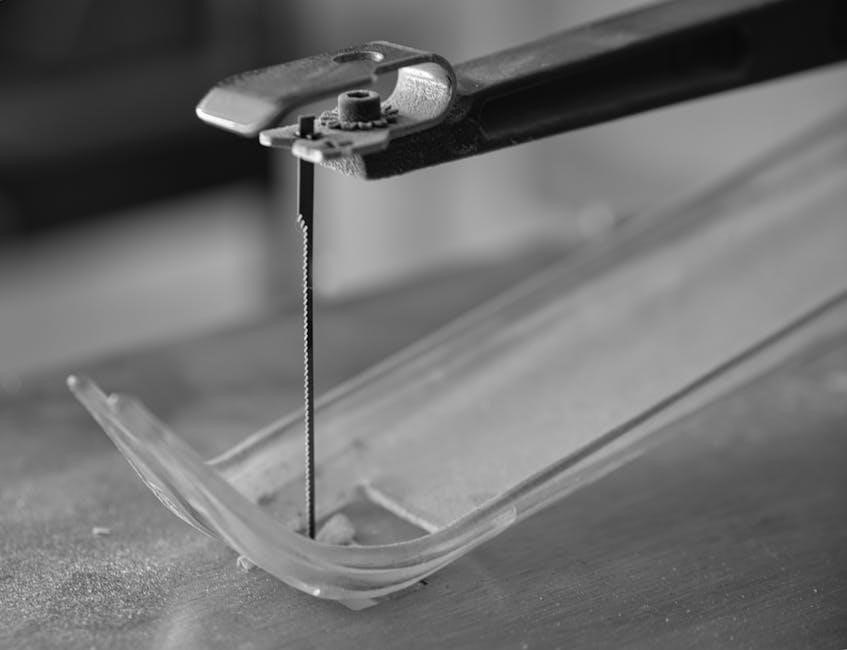
Cutting Curves with a Guide
Achieving smooth curves with a hand saw and guide demands a slightly different approach than straight cuts. Traditional rigid guides aren’t ideal for arcs; instead, consider flexible cutting guides designed to conform to the desired shape.
These guides often utilize a series of interlocking segments or a flexible metal strip. Slow, deliberate strokes are crucial, allowing the saw to follow the guide’s contour without binding.
Frequent adjustments and careful observation of the blade’s path are essential. For tighter curves, smaller, more frequent cuts are recommended, rather than attempting to force the saw through a significant bend at once. Practice and patience yield beautiful, flowing curves.
Using Multiple Guides for Complex Cuts
Tackling intricate designs often necessitates employing more than one guide during a single project. For complex shapes involving multiple angles or curves, strategically position several guides to define key segments of the cut.
Begin by establishing the primary guide for the longest, straightest section. Then, add subsequent guides to navigate corners, curves, or angled portions.
Ensure seamless transitions between guides by carefully aligning the saw’s entry and exit points. This technique demands precision and planning, but unlocks the ability to execute highly detailed and accurate cuts on even the most challenging workpieces.
Troubleshooting Common Issues
Common problems include saw binding or the guide slipping during use. Addressing these quickly—checking alignment and securing the guide—ensures smooth, accurate cuts consistently.
Saw Binding in the Cut
Saw binding indicates excessive friction within the kerf, often stemming from a dull blade, incorrect saw selection for the wood type, or applying too much pressure; A dull blade struggles to efficiently remove material, increasing resistance.
Ensure you’re using a rip saw for cuts with the grain and a crosscut saw against it. Reduce downward force; let the saw’s weight and sharpness do the work.
Periodically clear sawdust from the kerf to minimize friction. If binding persists, check the guide for proper alignment and ensure it’s securely fastened to the workpiece, preventing unwanted movement.
Guide Slipping or Moving
Guide slippage compromises cut accuracy, often caused by inadequate clamping or a guide lacking sufficient grip on the workpiece surface. Verify the guide is firmly secured using clamps or a non-slip backing, especially on smooth materials.
Self-adhesive guides require a clean, dry surface for optimal adhesion. For metal guides, ensure the clamping mechanism is tight and doesn’t allow any play.
Regularly inspect the guide for wear and tear; damaged guides are prone to shifting. A stable guide is paramount for consistent, precise cuts with your hand saw.