
Wall cabinets are versatile storage solutions that maximize vertical space. Perfect for kitchens, bathrooms, and garages, they offer functionality and style. Wall cabinet plans PDFs provide clear instructions, enabling DIY enthusiasts to create custom designs tailored to their needs.
Understanding Wall Cabinets and Their Importance
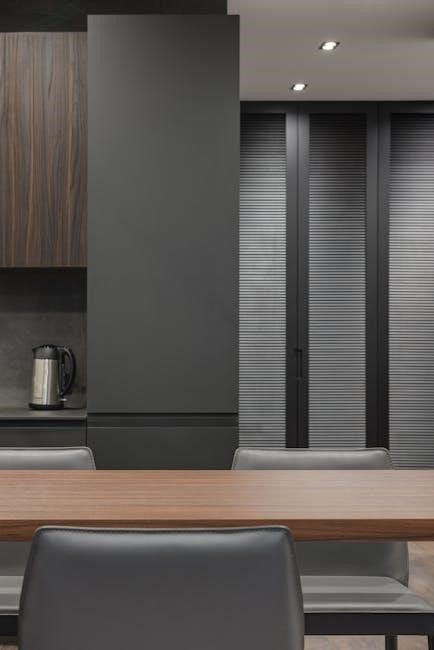
Wall cabinets are essential for maximizing storage while maintaining a sleek, organized space. They are ideal for kitchens, bathrooms, and garages, offering vertical storage solutions. Their importance lies in their ability to keep items accessible yet out of sight, enhancing both functionality and aesthetics. With various styles and designs available, wall cabinets can be tailored to fit any room’s decor. They also provide a practical way to utilize often-wasted wall space, making them a versatile and valuable addition to any home or workspace.
Why Choose DIY Wall Cabinet Plans?
DIY wall cabinet plans offer cost-effectiveness and customization. They allow you to create storage solutions tailored to your space and style. With step-by-step guides and 3D diagrams, even beginners can achieve professional results. DIY projects save money and provide a sense of accomplishment. They also let you choose materials and designs that match your home decor, ensuring functionality and aesthetics. Whether for kitchens, bathrooms, or garages, DIY wall cabinets are a practical and rewarding project for any skill level.
Materials and Tools Required
- Materials: 3/4 hardwood plywood, 1x2s, screws, hinges, 1/4 plywood for backs, and wood glue.
- Tools: Circular saw, drill, sander, tape measure, and screwdriver.
Essential Materials for Wall Cabinet Construction
To build a wall cabinet, you’ll need 3/4-inch hardwood plywood for the carcass, 1×2 lumber for face frames, and 1/4-inch plywood for the back panel. Screws, hinges, and wood glue are also necessary. Adjustable shelf pins and drawer slides may be added for functionality. Ensure all materials match in wood species for a cohesive look. Properly measure and cut each piece to fit your design. Use high-quality hardware for durability and a professional finish.
Necessary Tools for Building Wall Cabinets
Essential tools include a table saw for cutting plywood, a drill press for precise holes, and a sander for smoothing surfaces. A tape measure, square, and clamps ensure accuracy and stability. A cordless drill and screwdriver handle fastening, while a miter saw is useful for angled cuts. Safety gear like goggles and a dust mask are crucial. For finishing, a router and nail gun can add professional touches. These tools help ensure a sturdy, well-finished cabinet that meets your design and functionality needs.
Step-by-Step Building Guide
Follow detailed plans to cut, assemble, and install your wall cabinet. Start with precise measurements, then construct the box, attach shelves, and secure to the wall for stability.
Preparation and Planning
Before starting, assess the space and purpose of your wall cabinet. Gather materials like 3/4 plywood for the carcass and 1/4 plywood for the back. Tools such as a saw, drill, and sander are essential. Plan the design, deciding on size, style, and features like shelves or drawers. Use free PDF plans to guide your project, ensuring accurate measurements. Create a detailed cut list and visualize the assembly using 3D diagrams. Double-check all plans and measurements to avoid errors during construction. Proper preparation ensures a smooth and successful build.
Assembling the Cabinet Box
Begin by cutting the sides of the cabinet box to the required length, ensuring precise 45-degree miter cuts for flush joints. Assemble the box using dado joints for added stability, securing the back panel with screws; Attach 1×2 face frames to create a sturdy structure. Drill adjustable shelf holes for flexibility. Follow the PDF plans for exact measurements and visualize the assembly with 3D diagrams. Ensure all components fit seamlessly before securing them together. Proper alignment and tightening are crucial for a durable and professional-looking cabinet box.
Installing Doors and Hardware
Installing doors and hardware is the final step in bringing your wall cabinet to life. Attach hinges to the doors and align them with the cabinet frame, ensuring proper fit and smooth operation. Screw handles or knobs into place for easy access. Use adjustable hinges to fine-tune door alignment. Refer to your PDF plans for specific hardware placement. Securely fasten all components to ensure durability. Finally, test the doors to ensure they open and close smoothly, completing your wall cabinet project with both functionality and style.
Customization and Design Tips
Customize your wall cabinet with adjustable shelves, various finishes, and personalized features. Add crown molding or unique hardware to match your space. Tailor the design to fit your style and needs for a seamless look.
Adjusting Cabinet Size and Style
Adjusting cabinet size and style allows you to tailor your wall cabinet to fit specific spaces and design preferences. Use configurable plans to modify dimensions, ensuring the cabinet complements your room. Opt for frameless designs or add decorative trim for a polished look. Consider materials like 3/4 hardwood plywood for durability. Measure your space carefully to ensure a perfect fit. Adjustable shelves and customizable finishes further enhance functionality and aesthetics, making your cabinet both practical and visually appealing.
Adding Personalized Features
Adding personalized features enhances both functionality and aesthetics. Incorporate adjustable shelves for flexible storage or install soft-close hinges for smooth door operation. Consider adding lighting, such as LED strips, for ambient illumination. Customizable hardware, like knobs or handles, can match your interior decor. For advanced customization, include compartments or drawers within the cabinet. Personalized features ensure your wall cabinet meets specific needs, making it a unique and functional addition to any room while maintaining a cohesive design with the surrounding space.
Installation and Mounting
Secure installation ensures stability and safety. Use screw cleats for rigidity, attaching one to the cabinet and one to the wall. Mark stud locations for proper alignment and drill into wall studs for a sturdy mount. Ensure the cabinet is level and evenly spaced. Follow provided diagrams and instructions for precise mounting, ensuring the cabinet is firmly anchored to the wall to prevent tipping or damage, guaranteeing long-lasting use and reliability.
Securely Mounting the Cabinet on the Wall
Mounting your wall cabinet securely is crucial for stability and safety. Begin by locating the wall studs to ensure a solid anchor point. Attach two screw cleats—one to the back of the cabinet and one to the wall—aligning them carefully. Drill pilot holes to avoid splitting the wood, then screw the cleats into place. Use a level to ensure the cabinet is straight and evenly spaced. Tighten all screws firmly to prevent any movement or shifting. This method provides the necessary rigidity to hang the cabinet safely and securely on the wall, ensuring it remains stable and durable over time. Proper alignment and secure fastening are key to a successful installation, guaranteeing your wall cabinet will hold up well under regular use without any risk of tipping or damage to the surrounding area. Additionally, double-check all connections to ensure they are snug and even, as this will prevent any wobbling or instability in the future. By following these steps, you can confidently mount your wall cabinet and enjoy the benefits of your new storage solution. Always refer to the provided diagrams and instructions for precise guidance, ensuring a professional-grade installation. Remember, a secure mount is essential for both functionality and aesthetics, making your wall cabinet a reliable and attractive addition to any room. Taking the time to properly mount your cabinet will pay off in the long run, providing years of trouble-free service and maintaining the integrity of your space. Never overlook the importance of a sturdy installation, as it directly impacts the safety and performance of your wall cabinet. With careful planning and execution, your cabinet will be both visually appealing and securely fastened, offering peace of mind and practical storage solutions. So, take the extra moment to ensure everything is perfectly aligned and securely attached, and you’ll be enjoying your new wall cabinet in no time. The end result will be a sturdy, reliable, and attractive storage unit that enhances your home’s functionality and style. Proper installation is the final step in bringing your DIY project to life, so make sure it’s done right to fully realize the potential of your wall cabinet. By adhering to these guidelines, you’ll achieve a professional-quality installation that you can be proud of, ensuring your wall cabinet serves its purpose effectively for years to come. This careful attention to detail will not only protect your investment but also contribute to the overall safety and organization of your space, making it well worth the effort. In conclusion, securing your wall cabinet properly is a critical step that should not be rushed or overlooked, as it lays the foundation for both functionality and safety. Take your time, follow the instructions, and enjoy the fruits of your labor with a beautifully installed wall cabinet that meets all your storage needs.

Safety and Best Practices
Always wear protective gear like gloves and safety glasses. Ensure proper lifting techniques to avoid injury. Keep the workspace clean and well-lit. Follow all safety guidelines in your wall cabinet plans PDF to ensure a secure and successful build.
Ensuring Safety During Construction
Ensuring safety during wall cabinet construction is crucial. Always wear protective gear, including safety glasses and gloves. Use proper lifting techniques to avoid injury. Keep the workspace clean and well-lit to prevent accidents. Ensure all power tools are handled with care, following manufacturer guidelines. Use clamps to secure materials while cutting or assembling. Maintain a dust-free environment by using proper ventilation. Regularly inspect tools and materials for damage. Plan the build to avoid overreaching or balancing heavy objects. These precautions will help ensure a safe and successful project.
Best Practices for a Successful Build
Adhering to best practices ensures a successful wall cabinet project. Start by meticulously following your chosen PDF plan, double-checking measurements and material lists. Use high-quality materials to ensure durability and stability. Pre-drill holes to prevent wood splitting and achieve precise alignment; Assemble components on a stable workbench to maintain accuracy. Apply wood glue and clamps during assembly for a strong bond. Sand all surfaces before finishing to ensure a smooth appearance. Test hardware and doors for proper functionality before final installation. These practices will yield a professional-grade result.
Choosing the Right Plan
Selecting the ideal wall cabinet plan involves considering space, style, and skill level. Look for PDFs offering adjustable sizes and clear instructions to suit your needs perfectly.
Factors to Consider in Selecting a Plan
When choosing a wall cabinet plan, evaluate your space, skill level, and desired features. Ensure the design matches your room’s style and functionality needs. Check for adjustable sizes, clear instructions, and required materials. Opt for PDF plans with 3D diagrams for better visualization. Consider the type of doors, shelves, and hardware. Ensure the plan aligns with your tools and expertise for a successful build. This careful selection will guarantee a project that fits perfectly and meets your expectations.
Free Resources and PDF Plans
Access free wall cabinet plans PDFs online, offering detailed step-by-step guides, 3D diagrams, and materials lists. These resources help DIYers build custom cabinets effortlessly and efficiently.
Accessing Free Wall Cabinet Plans
Accessing free wall cabinet plans is straightforward, with numerous online resources offering detailed PDF guides. These plans often include 3D diagrams, materials lists, and step-by-step instructions. Websites provide designs for various spaces, such as kitchens, garages, and bathrooms, catering to different skill levels. Many plans are customizable, allowing users to adjust sizes and features. Additionally, video tutorials and configurable tools enhance the building experience. With instant downloads, DIY enthusiasts can start their projects quickly, ensuring a seamless and efficient process.
Advanced Techniques for Experienced Makers
Experienced makers can enhance their wall cabinets with advanced features like adjustable shelving, soft-close doors, and intricate designs. These techniques elevate functionality and aesthetics, offering a polished finish.
Enhancing Your Cabinet with Advanced Features
Enhance your wall cabinet’s functionality and aesthetics with advanced features like adjustable shelving, soft-close doors, and intricate designs. Experienced makers can incorporate beaded frames for a professional look or add crown molding for a polished finish. Solid wood materials ensure durability and style. Advanced plans often include 3D diagrams, making complex designs easier to visualize. Personalized touches, such as glass inserts or custom hardware, can elevate your cabinet’s appeal. These features allow you to create a truly unique and professional-grade wall cabinet tailored to your space and preferences.
Troubleshooting Common Issues
Addressing alignment and stability problems is key. Ensure proper hardware installation and verify all measurements. Check for level placement and secure wall mounting to prevent structural issues.
Identifying and Solving Build Problems
Common issues during wall cabinet construction include misaligned shelves, uneven surfaces, and hardware malfunctions. Start by double-checking measurements and ensuring all cuts are precise. For misaligned shelves, adjust shelf pins or brackets. If the cabinet is uneven, verify that it is properly leveled and secured to the wall. Hardware problems often arise from incorrect installation, so refer to manufacturer guidelines. Addressing these issues early ensures a sturdy and functional final product.
Maintenance and Upkeep
Regularly clean surfaces, inspect hinges, and tighten screws to maintain wall cabinets. Protect from moisture and ensure proper ventilation to preserve their condition and functionality over time.
Keeping Your Wall Cabinet in Great Condition
Regular maintenance ensures your wall cabinet remains functional and attractive. Clean surfaces with a damp cloth and mild detergent. Inspect hinges and drawer slides for smooth operation. Tighten screws and bolts periodically. Protect the cabinet from excessive moisture by ensuring proper ventilation. Avoid placing hot objects directly on surfaces. For wooden cabinets, apply a protective finish or wax as needed. Address any scratches or dents promptly to prevent damage from spreading. Proper care extends the lifespan and maintains the aesthetic appeal of your wall cabinet.
Building wall cabinets is a rewarding DIY project that enhances your space. With free PDF plans and guides, you can create functional, personalized storage solutions. Start building today and enjoy the satisfaction of your handiwork!
Final Thoughts and Encouragement
Building wall cabinets is a fulfilling DIY project that saves money and adds personalized storage. With free PDF plans and easy-to-follow guides, anyone can create functional and stylish cabinets. Whether you’re a beginner or an experienced maker, these resources empower you to bring your ideas to life. Stay safe, measure precisely, and enjoy the satisfaction of crafting your own wall cabinets. Start your project today and transform your space with custom storage solutions!